tomato soup

I've said it before, but soup is one of my favorite things to can.  There is nothing quite like grabbing a jar of soup from the basement on a cold winter's night and having a homemade dinner ready in a matter of minutes.  Throw a crusty grilled cheese in there and you've got a perfect comfort food!  If you are looking for a tomato soup recipe, here is the one that I came up with this year.  I'm rather excited about!  I made a double batch and ended up with 6 quarts.  However, I probably could have let it cook down a bit more so that it was a little thicker.  I think the little bit of sugar helps soften the acidity of the tomatoes and wine.  Add more or less to taste.  Enjoy!!

image.jpg

Tomato Soup

12 cups of peeled, cored, and chopped tomatoes

1 large onion, chopped

1/2 cup dry wine (I used a chardonnay, but a red would probably add an even better flavor)

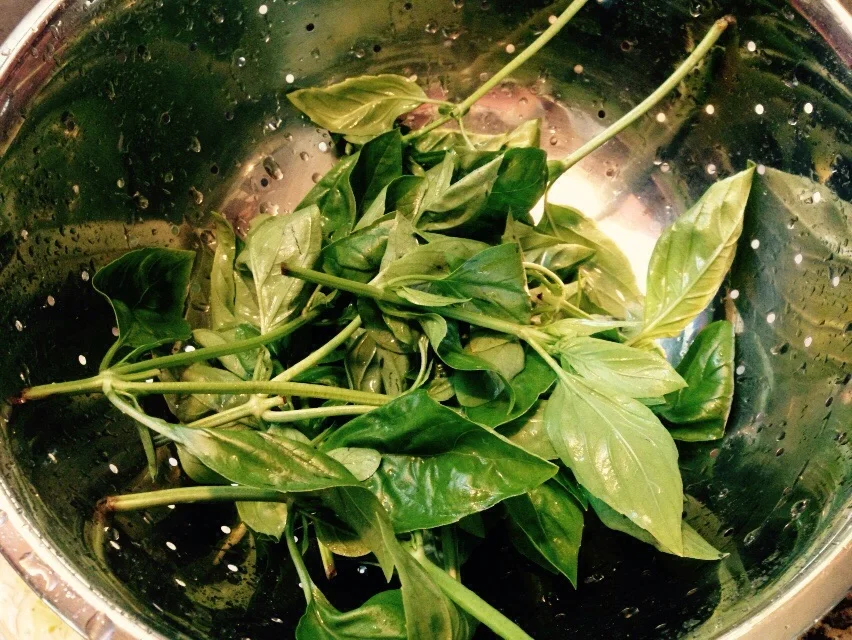
2-4 tablespoons fresh basil, chopped

2 cloves of garlic, chopped

2 tablespoons unsalted butter

1 tablespoon sugar

1 teaspoon salt

ground pepper to taste

Melt butter in a large stock pot.  Cook onions in the butter until translucent.  Add garlic and cook until fragrant.  Add tomatoes.  Bring to a boil, reduce heat, and simmer for 30-40 minutes.  Turn off heat and let cool for a few minutes.  Using an immersion blender, blend until smooth (or blend in a regular blender in small batches until smooth).  Add wine, sugar, salt, pepper, and basil.  Simmer until reduced to desired consistency.  

Pour into clean jars.  Either freeze or can.  Pressure canning is the preferred canning method for soups.  Process the jars at 11 pounds for 25 minutes.  

When ready to serve, add a bit of half and half or heavy cream to thicken and make it creamy.  Yum!

Yield: 2-3 quarts

for crisp mornings

The end of my summer vacation will soon be coming to a close and over the past week I've started to feel the pull of routine calling my name.  During the school year, I love drinking chai tea in the mornings.  Whether I drink it in my living room chair or during an early morning class, I love starting my days with it's spicy sweetness.  In preparation for the fall semester, which starts for me in just over a week, last week I made a batch of my loose leaf chai tea.  When I mixed up this batch the weather was hot and humid and rather unpleasant, but yesterday and today we've been graced with a bit of cool crispness.  As the rain fell this morning I was able to sit in my living room chair and sip a warm cup of chai with a bit of yarn in my hands for a bit before getting my day started.  It was delightful.  

image.jpg
image.jpg

image.jpg

Cinnamon Ginger Chai Tea

1 pt cinnamon sticks, broken into small pieces

1/2 pt darjeeling tea

1/2 pt ginger root, chopped & dried

1/2 pt cardamom pods, slightly broken to release the oils

1/4 pt shatavari root (optional, it's a fabulous root that supports the female reproductive system)

1/8 pt coriander seeds

1/8 pt whole cloves

1/8 pt orange peel, chopped & dried

1/16 pt black pepper corns, slightly crushed

Combine the ingredients in a large bowl and mix well.  Store in an airtight container.  Use about a teaspoon for an 8 ounce drink.  Steep for 5-10 minutes.  The roots in the tea usually require a longer steeping time to really release their flavor.  Add a bit of honey and cream to taste.  Sip and enjoy! 

image.jpg
image.jpg

I love this recipe because it's so easy to tweak depending on the flavors you love (or those you don't).  I also like that you can add as much tea as you want, meaning you can control the caffeine, which I love.  I get all of my loose herbs and the darjeeling for this recipe (besides the shatavari root) at our local food co-op.  You can also order them all from Mountain Rose Herbs if you are unable to find them locally for a good price.  The cost of this tea should be about the same as if you were to buy an equal number of high quality chai tea bags.  So, if you are finding that the herbs at your grocery store are too expensive, look elsewhere.  Herbs, in general, should not cost $4-5 for a tiny little container! 

As for drying the orange and ginger, if your kitchen is dry and not humid, they will probably dry just fine if you leave them out on the counter overnight.  You can also dry them in a low temperature oven for 20-30 minutes, or until they are fragrant and feel dry to touch.  

I hope you enjoy this recipe as much as I do!  It's getting me excited for fall, which will be here before we know it! 

basil pesto

Herbs have been making their way into the kitchen in fistfuls and basketfuls over the past several weeks.  My first batch of oregano has been dried, crushed, and stored away for the months ahead.  A small batch of thyme is now ready to crush and put in a jar and a bit of peppermint is now hanging in the kitchen window.  Finally my basil plants were ready this week to cut back for my first batch of pesto.  I love to make pesto a few times during the summer, freeze it in ice cube trays, and then move it into containers in the freezer.  I've found that ice cube-sized pesto is the perfect amount to add to any recipe.  It's just the right amount for my favorite grilled pesto, provolone, and red pepper sandwich and just a few cubes are needed for a batch of pasta or gnocchi for a dinner for two.  

image.jpg

There are so very many pesto recipes out there, and mine is nothing new or revolutionary.  However, I do like to use walnuts instead of pine nuts in my version.  I like the darker nutty flavor that walnuts give the pesto and they are also cheaper, which is a great bonus.  I also usually have walnuts on hand, whereas pine nuts I do not.  So, if you're looking for a new recipe to try...here you go!  Most pesto recipes call for parmesan, but since I freeze mine, I don't add any parmesan to the pesto.  Instead, I usually add parmesan, or another type of cheese, to the dish that I'm adding the pesto to.  I find that this just works better for the way I cook and simplifies what's needed to make the pesto, which I'm all about.  

image.jpg

Basil Pesto 

1/2 cup walnuts

1/2 cup olive oil

2 cloves garlic

2 cups packed fresh basil leaves

1 teaspoon lemon juice (fresh or bottled, but fresh is preferred)

1/2 teaspoon salt

Add the walnuts and olive oil to a blender or food processor and blend until mostly smooth.  Add the garlic and blend until smooth.  Add the basil leaves, small amounts may be necessary depending on your blender/food processor.  Add the lemon juice and salt.  Processor until it reaches your preferred consistency.  I tend to leave mine a bit chunky.  Fill an ice cube tray with the pesto.  One batch should fill one ice cube tray (in the picture above I reserved a bit for my dinner that night so it didn't quite fill a tray).  Freeze until solid and then transfer into a freezer container or bag.  Keep in your freezer for up to a year and use as you need it!


image.jpg

How about you?? Do you have a favorite basil pesto or other herb pestos that you love??  I'd love to hear about them! 

washing windows

Windows!  We have so many windows!  Sixteen on our main floor, to be exact, and six upstairs.  I love our windows for the wonderful ventilation and natural light that the bring to our little house, but when it's time to wash the windows, it isn't a quick task!  And if we're being completely honest, it happens very rarely in this house.  

Now, sometimes in my natural living adventures I forget that some of the simplest, everyday tasks, I occasionally take for granted.  For example, over the past couple months, I've noticed in other people's homes the large number of cleaning supplies that fill their cupboards: tub and tile, disinfectants, wood cleaners, wood polishers, stainless steel cleaners/polishers, disposable floor mops and their specific cleaning solutions, the list goes on and on.  However, the one that always stands out to me as very unnecessary and often rather ineffective is the bottle of window cleaner.  The reason for this is that my Grandma taught me many years ago that the best way to wash windows is to use warm water, a little vinegar, and a little lemon juice.  And she is so very right about that.  Nothing is easier, cheaper, safer, or more effective!  

So, while this may not be new news to you at all, I thought I'd share it for those who may find their cupboards a bit overloaded with cleaning supplies and those who may be looking for a way to simplify and clean in a more natural, safe, and effective way.  This simple cleaning solution not only produces streak-free, crystal clear windows, but since it's made from edible ingredients, it's perfectly safe for anyone in your household to use (or accidentally consume!). 

image.jpg

Natural Window Washing Solution

1 gallon of very warm water

1/4 cup of white vinegar

2 tablespoons of lemon juice (fresh or bottled both work, but I prefer bottled since it's easier to use and doesn't have pulp)

Add the vinegar and lemon juice to the warm water and use a lint-free cloth to wipe down windows and sills with the water mixture.  Then use a dry towel to wipe the window dry.  I have found that microfiber cloths work the best for both washing and drying.  


And there you have it!!  A simple, natural, and effective way to wash your windows!  Thanks, Grandma Nola! 

spruced up and dandy gimlet

Well, as promised, I put all those spruce tips to work and came up with this lovely little spring cocktail!  I was even able to incorporate the Citrus Spiced Dandelion Bitters I finished making last week!  Together they make a cocktail that's light, refreshing, and just delightfully earthy!  I hope you enjoy it as much as we do! 

image.jpg

Spruced Up and Dandy Gimlet

2 oz gin

1/2 oz spruce tip syrup

2 lime slices, squeezed

soda water

1 dropper full (or a few dashes) of Citrus Spiced Dandelion Bitters

Mix syrup with gin and limes, add ice, soda water, and bitters.  Stir and enjoy.